INTERMEDIATE BUILD SU-33 SEA FLANKER
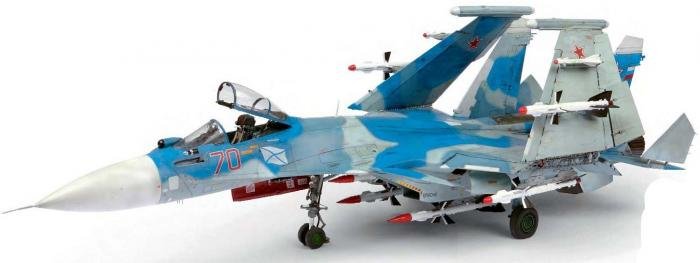
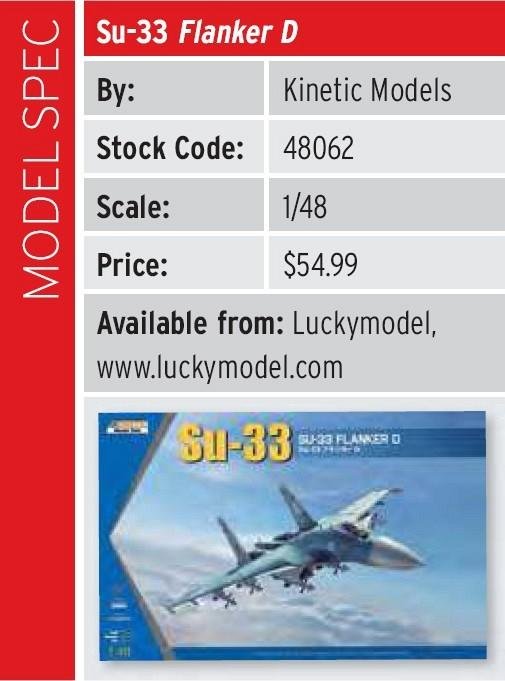
Chris Clay builds Kinetic’s 1/48 Su-33 Sea Flanker, one of Mikhail Simonov’s finest designs

Despite its superpower status, the Soviet Union wasn’t known for its naval fighters, and it didn’t field suitable ships or modern interceptors until the end of the Cold War. While the Soviet/Russian Navy had operated Moskva-class helicopter carriers and Kiev-class heavy aircraft-carrying cruisers, just the latter had fixed-wing assets, with Yakovlev’s vertical/ short take-off and landing Yak-38 Despite its superpower status, the Soviet Union wasn’t known for its naval fighters, and it didn’t field suitable ships or modern interceptors until the end of the Cold War.
While the Soviet/Russian Navy had operated Moskva-class helicopter carriers and Kiev-class heavy aircraft-carrying cruisers, just the latter had fixed-wing assets, with Yakovlev’s vertical/ short take-off and landing Yak-38 Forger. By the late-1980s efforts to operate conventional aircraft began to bear fruit, and in 1989 the Soviet Navy began trials with the newly commissioned carrier Tiblisi, which was officially designated as a heavy aircraft- carrying missile cruiser. These involved MiG-29K and Sukhoi Su-27K aircraft (K for korabel’nyy - shipboard), with the latter (created initially by General Designer Mikhail Simonov) selected for operational use.
The breakup of the Soviet Union caused much disruption, but by late 1991, all 24 production Su-27K’s (re-designated Su-33) were delivered, and embarked on the renamed Admiral Flota Sovetskogo Soyuza Kuznetsov. These formidable fighters, NATO nicknamed Flanker-D, came to prominence during the 2016 Syria crisis, with the carrier displaying them on deck as it transited the English Channel enroute to the Mediterranean.
Detailed interior
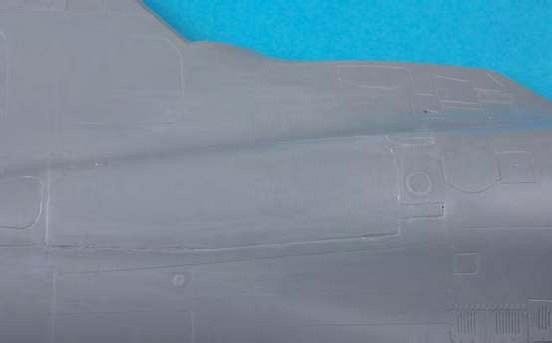
Kinetic’s 1/48 Su-33 was awaited eagerly by modellers, and while the styrene components were superb examples of moulding, the instructions were occasionally challenging, with incorrect numbering and vague locations. There were 29 plastic runners in total, and the surface detail was excellent throughout, comprising fine engraved panel lines and rivets. The air-to-air weaponry was easily the highlight in terms of quality, with exquisitely slide- moulded examples of AA-11 Archer and long-range AA-10 A/amo-C and -D missiles, plus their respective launch rails. A small photo-etched (PE) metal fret was also included, and this supplied cockpit levers and head-up display frame, canopy mirrors, air intake grilles, undercarriage splash guards, afterburner rings and control fins for the Archer missiles.
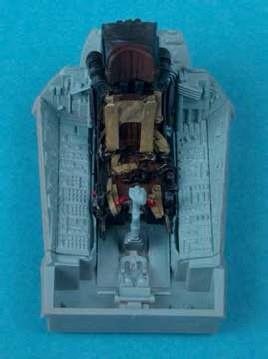
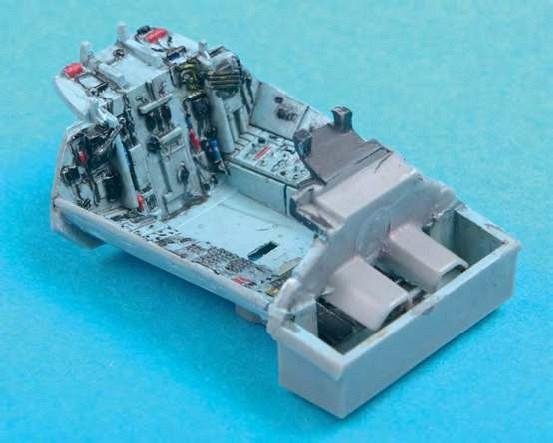
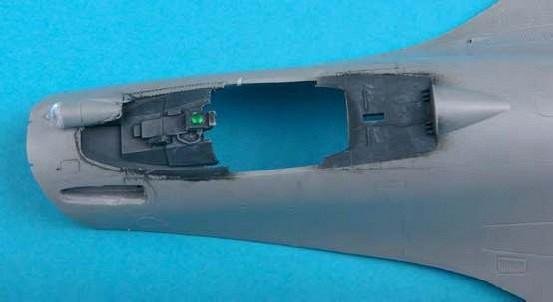
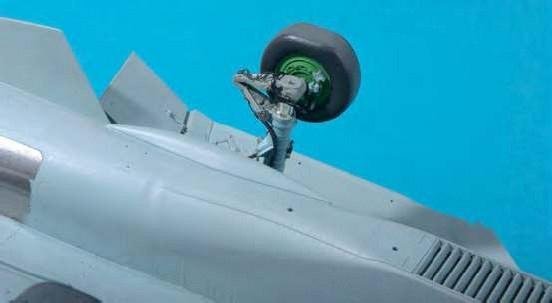
Construction started in familiar fashion, with the cockpit; note, while Kinetic’s colour labelling tended to favour Vallejo products, Czech-manufacturer Agama’s paints were used throughout this build unless stated otherwise. The tub, consoles and instrument panel were moulded crisply - the latter was a single item, with excellent raised detail. All cockpit components received Agama R28P Light Grey Standard as a base tone, before the tiials and switches were painted with various acrylics and enamels; reference photos were vital for a realistic appearance. The consoles were then dry- brushed to highlight the moulded features. The kit’s K-36DM ejection seat was more than acceptable straight from the box, as it required the addition of just the seatbelts, but it was decided to replace it with an aftermarket item, Aires’ (www.aires.cz) resin product (4263) being selected. While the seat was painted at the same time as the cockpit, it wasn’t installed until much later.
Gear challenges
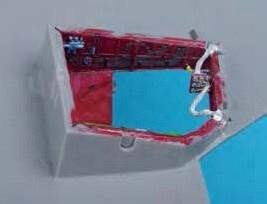
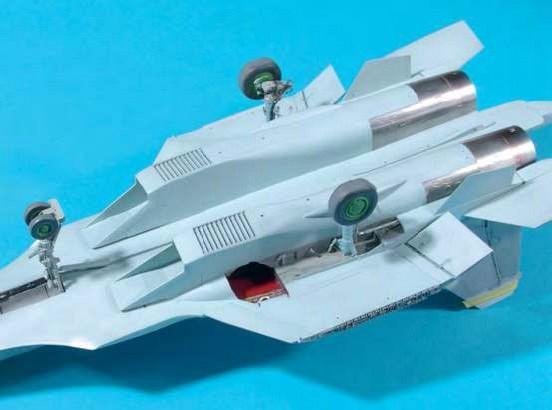
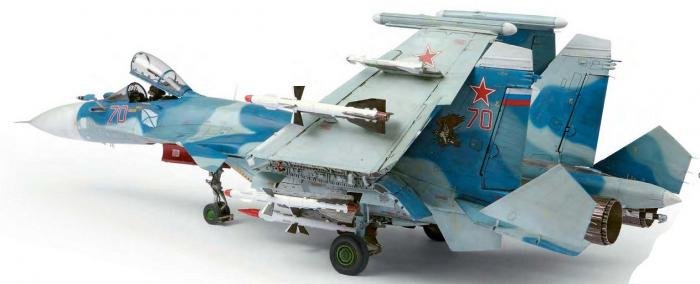
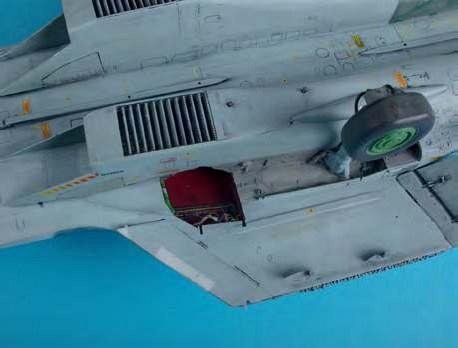
Focus then shifted to the undercarriage bays, and again the level of moulded detail was most pleasing, with separate panels for the sidewalls, and extra detail, in the form of wiring looms, was added. Construction deviated from the instructions at this point, which suggested adding the bay doors…these were left of until the end, to prevent unnecessary damage during handling.
The main undercarriage bays, plus the associated door inner sides all received Mr. Color H86 Red Madder, after which the extra internal cabling and piping was added. These items were fashioned from various diameters of wire and then painted in accordance with reference photos.
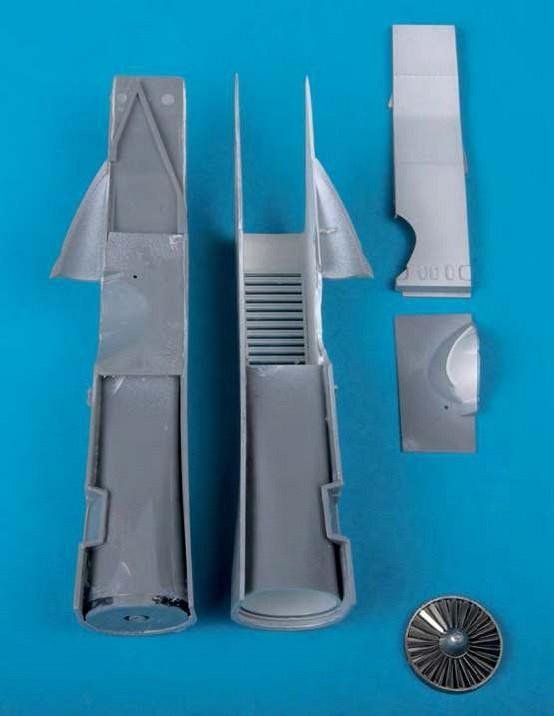
Attention then shifted to the intakes, and although most of the assembly proceeded smoothly, the location of two small PE components (PE29/30) caused much confusion, this being resolved later when the undercarriage was attached. Fit of the intake nacelles (Parts F16 and F17) was poor, and proved to be the worst of the entire project, as they required much filling, sanding and re-scribing; admittedly the latter wasn’t the most enjoyable task, also being one I still have much to learn about.
At this point, Kinetic suggested the undercarriage legs should be added, but as with the doors, it is arguably much easier to leave these until later, and certainly after the fuselage halves were mated. Assembly of the nose and mainwheel legs proceeded smoothly, with care taken to drill two 0.4mm diameter holes in each of the former’s four PE splash-guard plates, prior to being attached to the styrene with CA. Once these had dried, a short length of wire was threaded through the holes and secured with a small drop of CA, after which the wire was trimmed to size.
This was a delicate process with the occasional drill bit being broken, but the result was worth the effort. The finished undercarriage legs and the inner surfaces of the front bay were then airbrushed with R28P Light Grey. After two days drying, hydraulic and electrical lines were added and painted, while Bare-metal self-adhesive Chrome Foil (www.bare-metal.com) enhanced the oleo sections, and the styrene light lenses were replaced by items from the Little Cars range (www.modellingtools.co.uk). These were then set aside for final assembly.
Folded mainplanes
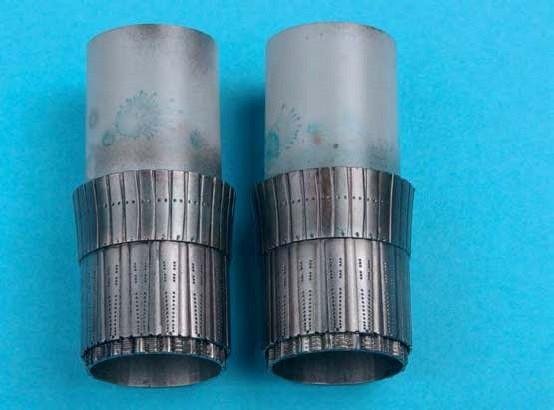
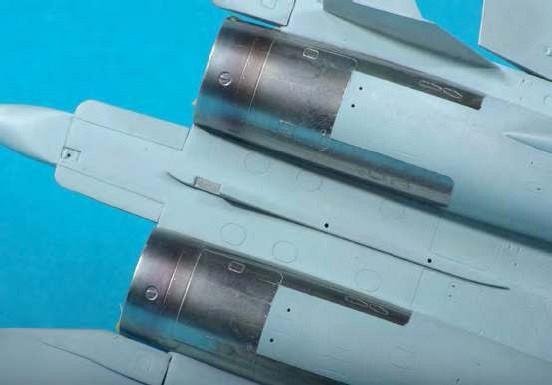
In a further deviation from Kinetic’s suggested build sequence, it was decided to proceed with the jet pipes, and these came together without issue. Note the afterburner rings (PE12/23) were extremely fragile, and these demanded careful handling so as not to distort or damage them during construction. All parts were then airbrushed with Alclad’s ALC-305 Gloss Black Base in readiness for the firm’s metallic lacquers, with ALC-112 Steel, ALC-115 Stainless Steel and ALC-118 Titanium Gold applied to create a suitably heat-stressed appearance.
Once these hues had dried, a dark wash was applied to the inner faces, to accentuate the moulded detail. As with previous sub-assemblies, these were then set aside until later.
Sukhoi liveries
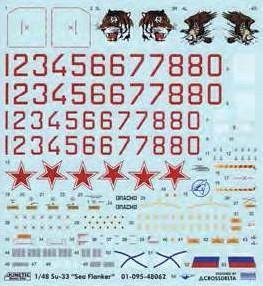
Kinetic’s small, yet busy decal sheet supplied unit insignia and numerals to enable any aircraft from the 279th Independent Shipborne Fighter Aviation Regiment, which operates all Russia’s Su-33 Flanker-Ds, to be portrayed. The eagle and tiger artwork (for the vertical fins) was most impressive, these being the emblems for the 1st and 2nd Naval Fighter Aviation Squadrons respectively. The colour guide suggested Mr. Hobby tones, with alternatives for Vallejo, AMMO-MIG, Italeri/Testors, Humbrol, Tamiya and Akan products.

with white glue.
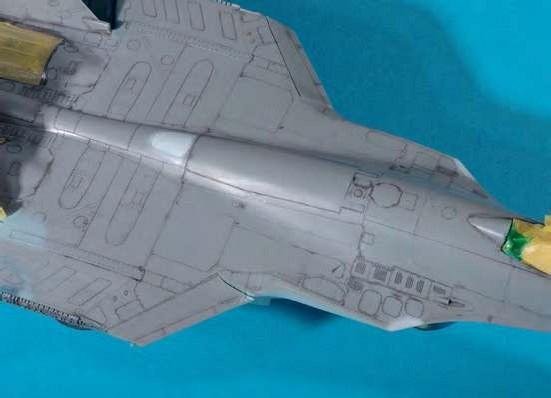
Upper and lower fuselage halves were then mated with Tamiya’s Extra Thin Cement; Berna Clamps and masking tape held everything in place, as the fit wasn’t the best, and I found it to be somewhat disappointing for a kit of this complexity and price. Gaps were treated with filler, and then sanded to restore the smooth surface. Reference photos were again necessary when assembling the canopy, due to the vague instructions, but otherwise this proceeded smoothly, and was then set aside to dry.
From the outset, it was always intended to fix the wings in the folded position, as this created a more interesting model…and occupied less display space. Kinetic provided options for slats/ailerons to be either raised/ lowered, offering multiple configurations, and in the end, it was decided to have all wing control surfaces deflected. The suggested assembly sequence was followed here, but note the tail cone/parachute housing and airbrake would not be open on a carrier-based aircraft, plus photograph evidence highlighted these were used rarely. True to form, the airbrake fit was poor, so gaps were filled with thick CA and then sanded — any panel lines removed during this correction were then re-scribed.
All the ‘dangly bits’, including ailerons, flaps and leading-edge slats weren’t installed yet, to prevent damage while handling. The folded horizontal stabilisers had particularly fragile joints, and broke easily, so they too were omitted until after painting was completed.
Missile dilemmas
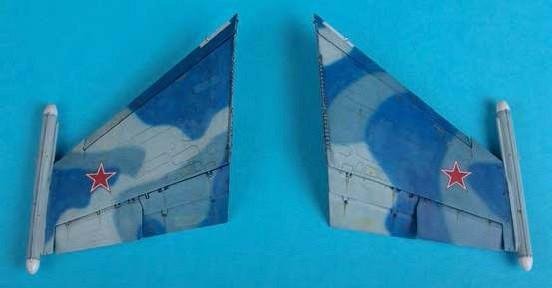
There were small gaps on bases of the port vertical fin’s outer face and the starboard’s inner side, but these were easy to repair, with a drop or two of Mr. Dissolved Putty. This was left for approximately 20 minutes and then a Mr. Color Leveling Thinner 400-soaked cotton bud was wiped gently along the seams, which created an almost invisible join. Rudders were also added at this stage as they were a snug fit, and the join was remarkably robust. Both outer wing sections were assembled as per the instructions and then set aside for painting. All static discharge rods, which were moulded integrally with the horizontal stabilizers, were removed — these would be replaced later with turned brass alternatives from Master Model. Similarly, the kit’s wing tip-mounted electronic countermeasures pods weren’t used, as they appeared oversized, with Wolfpack Design’s (www.wolfpack-d.com) resin Sorbtsiya L-004 units (WP48104), favoured instead.

Another fit issue arose with the nose cone, which was filled with weight before being added, to prevent the model being a tailsitter. Gaps were filled with thick CA and then sanded…any detail lost during this process was reinstated via a scribing tool.
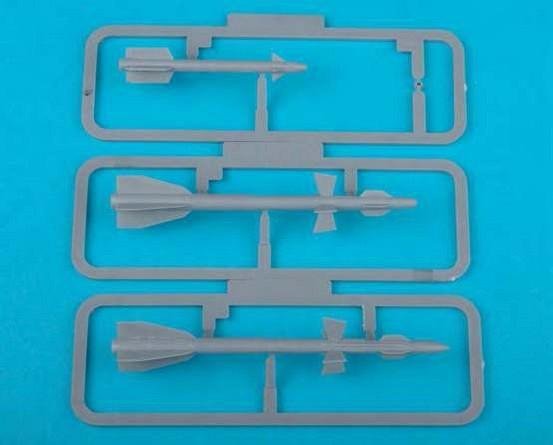
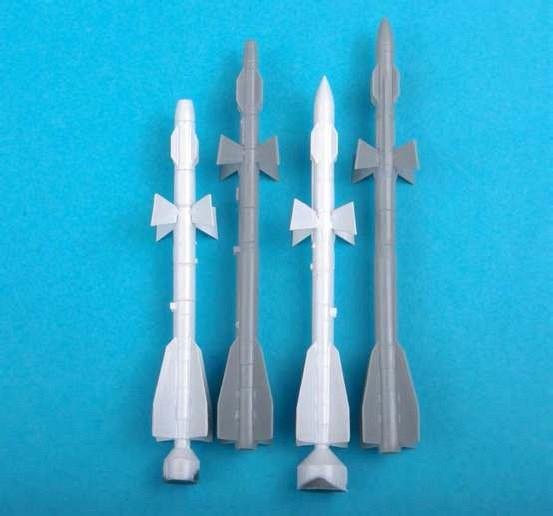
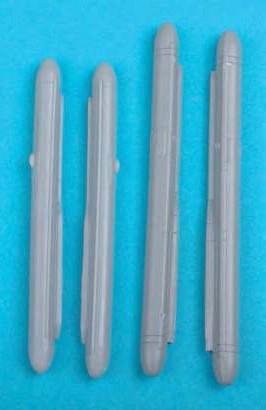
The kit’s weapons were a delight, but most reference photos appeared to show shipborne Flankers carrying pairs of shorter-ranged Alamo-A and -B variants, as opposed to Kinetic’s larger s and s. Eduard’s R-27R/R1/AA-10 and R-27T/T1/AA-10 (648043 and 648048 respectively) were duly acquired, and these also featured resin launcher rails and protective seeker-head covers. The latter were chosen and painted red, which added a splash of colour to the finished model. Four of each missile type were supplied, and as the Su-33 is festooned with pylons, it seemed churlish not to include them all. A pair of Eduard’s R-60/AA-8 Aphid (648082) completed the missile fit (which was based on a reference photo), and these were attached to the outboard stations. All were painted as per Eduard’s colour guide, with white main bodies.
Aftermarket delights
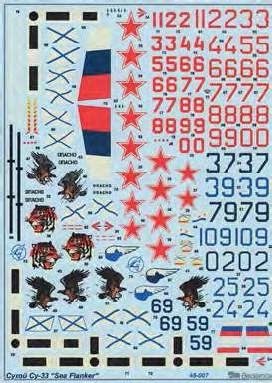
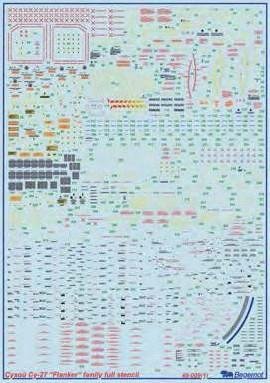
A comparison between Kinetic’s and Begemot’s markings (www.begemotdecals.ru) revealed the latter were superior in quality, so its superb 48-007 Cyxoҋ Cy-33 ‘Sea Flanker’ and 48-009 Cyxoҋ Cy-27 ‘Flanker’ were selected. The latter didn’t just cater for the airframe, as they supplied decals for the weapons and pylons, but the sheer number of items meant application was spread over several evenings.
Flanker hues
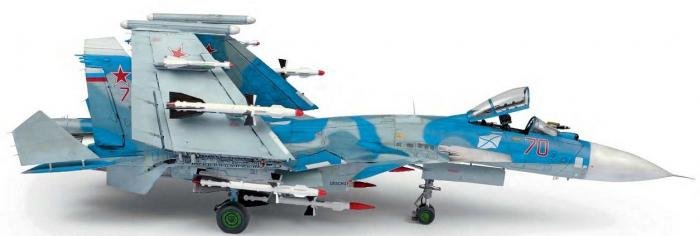
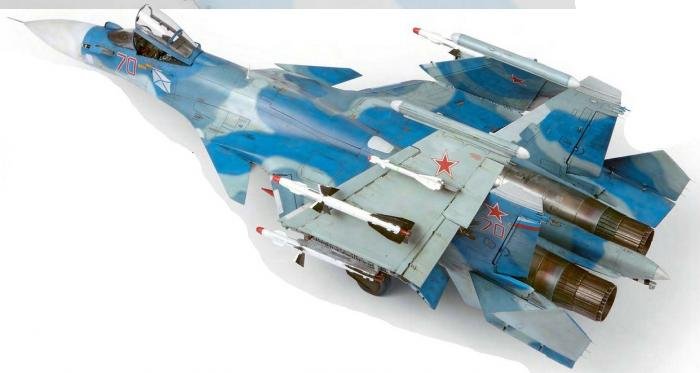
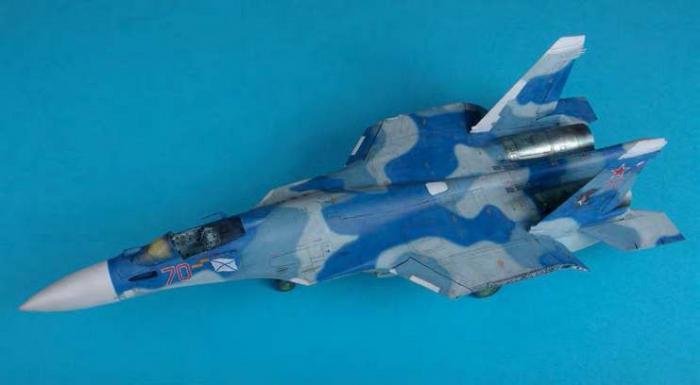
Painting is the stage I enjoy most during a build, particularly if the scheme is challenging to replicate. The Su-33 was a great subject, as it has worn at least three different camouflage patterns during its service life, and these weathered quickly when embarked on Kuznetsov.
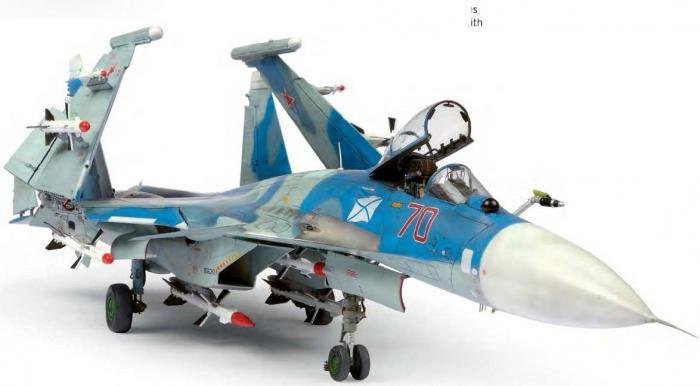
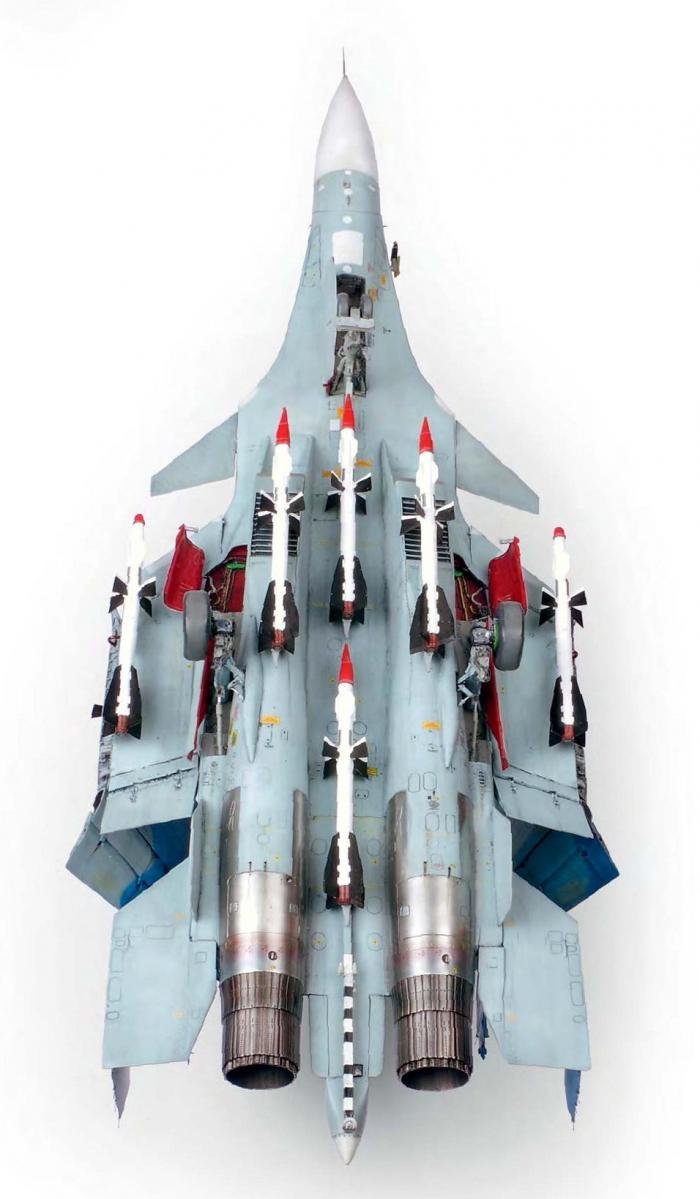
After much deliberation, it was decided to opt for the most recent livery, which comprised overall Light Blue Grey with disruptive Dark Blue Grey and Dark Blue. It’s always worth checking references when dealing with modern Russian aircraft, as often there are disparities between individual airframes, including a mix of hard- or soft-edged demarcations, and the Su-33 was no exception.
The paints were diluted approximately 75% with lacquer thinners — R27P Light Blue Grey was the first to be airbrushed, via a Harder & Steenbeck Ultra 0.4mm needle, and allowed to cure for two days. As this aircraft had a soft-edged pattern, R29P Dark Blue Grey was then sprayed freehand, with an Iwata HP-BH 0.2mm needle at low pressure (approximately 12 PSI/0.8bar).
The model was again set aside for two days to dry, before the final hue, O9M Dark Blue was applied in the same manner. Agama’s paints dried with a matt finish, similar to older Humbrol paints, so the model received a gloss varnish in readiness for decaling. Mr. Hobby White was used on all dielectric panels, plus the nose cone.
Many markings
Although Kinetic’s decals were more than acceptable, it was decided to opt for Begemot’s aftermarket products, as they offered greater variety for the intended scheme (see panel).
After much deliberation, ‘Red 70’, 1st Naval Fighter Aviation Squadron (Eagles), Semeromorsk-3 airfield, summer 2001 was selected. This was flown by Major General Timur Apakidze, who was the first military pilot to conduct both day and night operations from the Kuznetsov. Sadly, this aircraft crashed on June 17, 2001 during an airshow at Ostrov Airfield, killing its pilot.
”THE SU–33’S COMPLEX CAMOUFLAGE WAS AIRBRUSHED FREEHAND”
REFERENCES
Su-27 Flanker, by Sergey Skrynnikov (Concord), ISBN: 978-9-62361-710-0
Sukhoi Su-27, by Yefim Gordon (Ian Allan), ISBN: 978-1-85780-247-4
Sukhoi Su-27 Flanker, by Yefim Gordon (Airlife), ISBN: 978-1-84037-029-4
Application of the main markings proceeded smoothly, but the stencils were timeconsuming, as there were more than 300 individual items. Progress was tracked by the simple means of crossing through the numbers with a pencil on the placement guide as each was added…hours and hours of happy rewarding toil! The model was set aside for several days, and the model received a sealing coat of Vallejo’s 28.518 Matt Acrylic Varnish (www.creativemodels.co.uk). While no pre-shading effects were created, Daler-Rowney 065 Panye’s Grey Gouache (www.daler-rowney.com) was employed as a post-shade. Being waterbased, it was quick and easy to apply, yet very messy.
After a satisfactory finish was achieved, a further matt varnish sealed the model. Final assembly was straightforward, although patience was required for the smaller items. Although Kinetic’s Flanker is a large for a singleseater, it was also very fragile, due to the armament and folded wings and horizontal stabilisers. Similarly, Master Models’ turned brass pitot (AM-48-066) and static dischargers (AM-48-008) were equally delicate, being the final pieces added.
Mixed bag
Kinetic’s naval Flanker had much to offer, but this was undermined by the poor instructions and questionable fit of major components. It was certainly one of the longest builds this writer has ever undertaken. Being the sole example of the type in 1/48 scale, it comes with a positive recommendation, but with reservations as stated previously. For those willing to keep the kit missiles, there’s more than sufficient for a combat load, with carrier-launched aircraft usually fitted with just two Archers and two Alamos, and the option for folded wings is a real plus. One thing is certain…it’s a cracker when it’s finished.