Because of the nature of my job, the knowledge of making a wax seal is a must. It is easy to believe that everyone knows how to make one when in reality, people can just be as clueless as we were when we first started playing with it.
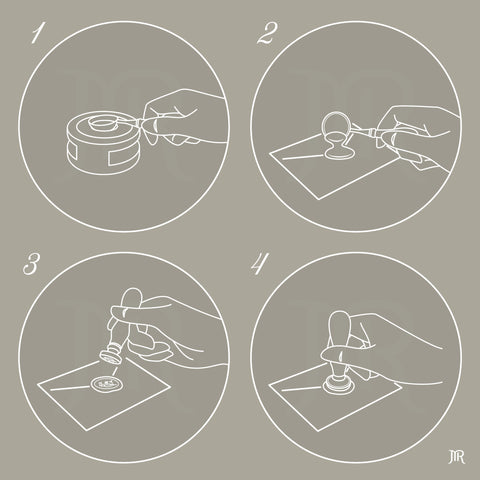
It is a really simple 4-step process to create a wax seal:
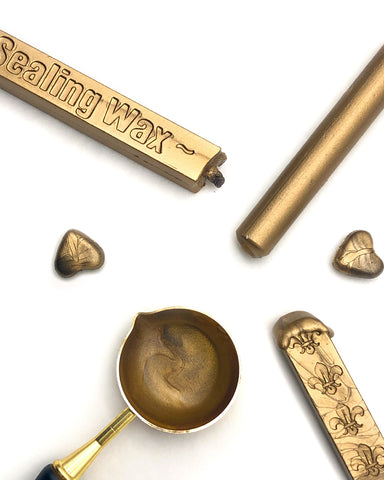
1. melt the wax in the spoon on the tea-light candle with furnace stove (optional)
2. pour the wax on your desired surface
3. stamp the wax seal stamp on the melted wax
4. lift the stamp up when the wax is cooled
Voilà, you made yourself a wax seal.
Yes, it is simple. There is nothing really fancy about it (though it sure makes a fancy decoration to whatever you put it with), but like everything else in life, we can either do a job, or we can do a good job. Some like a perfectly rounded wax seal, while others prefer a wax seal with naturally uneven bleed.
We want to offer you a little bit more here as to what you should look out for while making a wax seal so when you leave this blog post, you know you will be making beautiful seals from now on.
Here are the 3 criteria that we believe are crucial in making good wax seals:
Choose the type of wax wisely
In the past, we had written a post about what kind of sealing wax you should choose and went through all the different types of wax in detail and all the pros and cons. If you are wondering, aren’t all sealing wax the same but made with different molds? Yes, they are essentially made with the same materials (we are only focusing on different kinds of supple wax instead of traditional ones here), but the different shapes are meant to be used differently.
For example, you are not supposed to use wick wax sticks with sealing wax spoon because the wick was meant to act as the continuous heat source to melt the wax once you light it up, while non-wick wax sticks work best using a sealing wax spoon, a furnace stove and a tea light candle as the heat source. Glue gun wax sticks and wax beads can actually be melted with the same method, just that glue gun wax sticks give you the flexibility to pair it with a glue gun. Therefore, when it boils down, you are choosing between using a wick or using a spoon.
As mentioned in one of our early blog posts about the different types of wax, we strongly advise using a sealing wax spoon instead of wick wax sticks because it gives you more control over the temperature and how much wax you can melt at a time. With wick wax sticks, you have to patiently wait for it to drip one drop at a time, by the time you melted enough wax for a seal, half the wax has already cooled off. This is why we have a sealing wax toolset on our work desk because this method gives us even temperature melted the wax to create good wax seals every single time.
Learn to determine when the melted sealing wax is ready to be stamped
Now you know that I take the temperature of the melted wax very seriously. It’s time to talk about when is the right time to make an impression. It is easy to stamp the melted wax once you pour it out, but different temperatures can actually help you achieve different effects.
Take the Champagne Gold wax, for example, a higher temperature helps you achieve a more rustic result while a lower temperature helps you achieve that smooth liquid gold result. Wondering why? That is because the higher the temperature, the more vigorous the micro shimmer in the wax move, you can basically see the boiling motion of the heated up wax with the help of the shimmering particles.
While I like the rustic result, I actually prefer wax melted in low temperature most of the time because it is easier to be handled and I mostly enjoy the liquid gold effect as it is perfect to showcase more complex designs. So how do you determine if the wax is in a low enough temperature that is good to be stamped? I generally tell my clients to look at its consistency and bubbles! Sealing wax in low temperature has the consistency of thick liquid (think about honey), and because it is not in a high boiling temperature, you will not be seeing the wax bubbling. When you see both signs, it’s time to go stamping.
Pro tip: use a toothpick to stir the melted sealing wax so it is melted evenly all around.
When to lift the wax seal stamp
Now you may think, as a general rule of thumb, you lift the stamp when the wax seal is cooled. This is the step where some can experience a ‘sticky situation’ where the wax seems to be sticky and got stuck in the engraved lines of the stamp. This occurs because there is no barrier between the stamp and the wax. Therefore, if you lift the stamp when the seal is not fully cooled down, the wax will stick the stamp head.
In the early days of misterrobinson, we had heard the advice of using a tiny bit of oil as a barrier to avoid the stickiness, but we do not really like the idea of having oil around the very important wedding invitations that our clients are going to seal. This is why we opt for the ‘cold stamp method’ where we make sure the stamp is cool before we stamp. Truth be told, the stamp is generally cold if you are only making one seal, but you are creating multiple, or even over a hundred at a time, the stamp will quickly turn hot due to its contact with the melted sealing wax.
To solve this problem, we use an ice pack (or you can use ice cubes) to cool the stamp off before going in and stamping again. We like using an ice pack because it is less messy to use than just ice cubes when the ice within starts melting. One thing you have to keep in mind is to have a piece of fiber cloth in hand to wipe off the water drops on the stamp before stamping in. These water drops will create watermarks on the seal disturbing the design.