
If you’re looking for an affordable and unique way to create a living space, converting a shed into a tiny house might be just the thing for you. With a little creativity and careful planning, you can transform a basic shed into a cozy and functional home. In this article, we’ll guide you through the steps of converting a shed into a tiny house, from choosing the right shed to building a solid foundation and designing the interior layout. Whether you’re looking for a simple guesthouse or a full-time residence, this guide will help you turn your shed into a comfortable and stylish living space.
3 Routes for Tiny Shed House Conversions
What were you thinking when you searched how to convert your shed into a tiny house?
- The Fully Functional Tiny House – Livable all year around, with all the necessary appliances, plumbing and electricity.
- The Off-Grid Tiny House – Basic necessities, solar powered, wood stove, outhouse, or compost toilet.
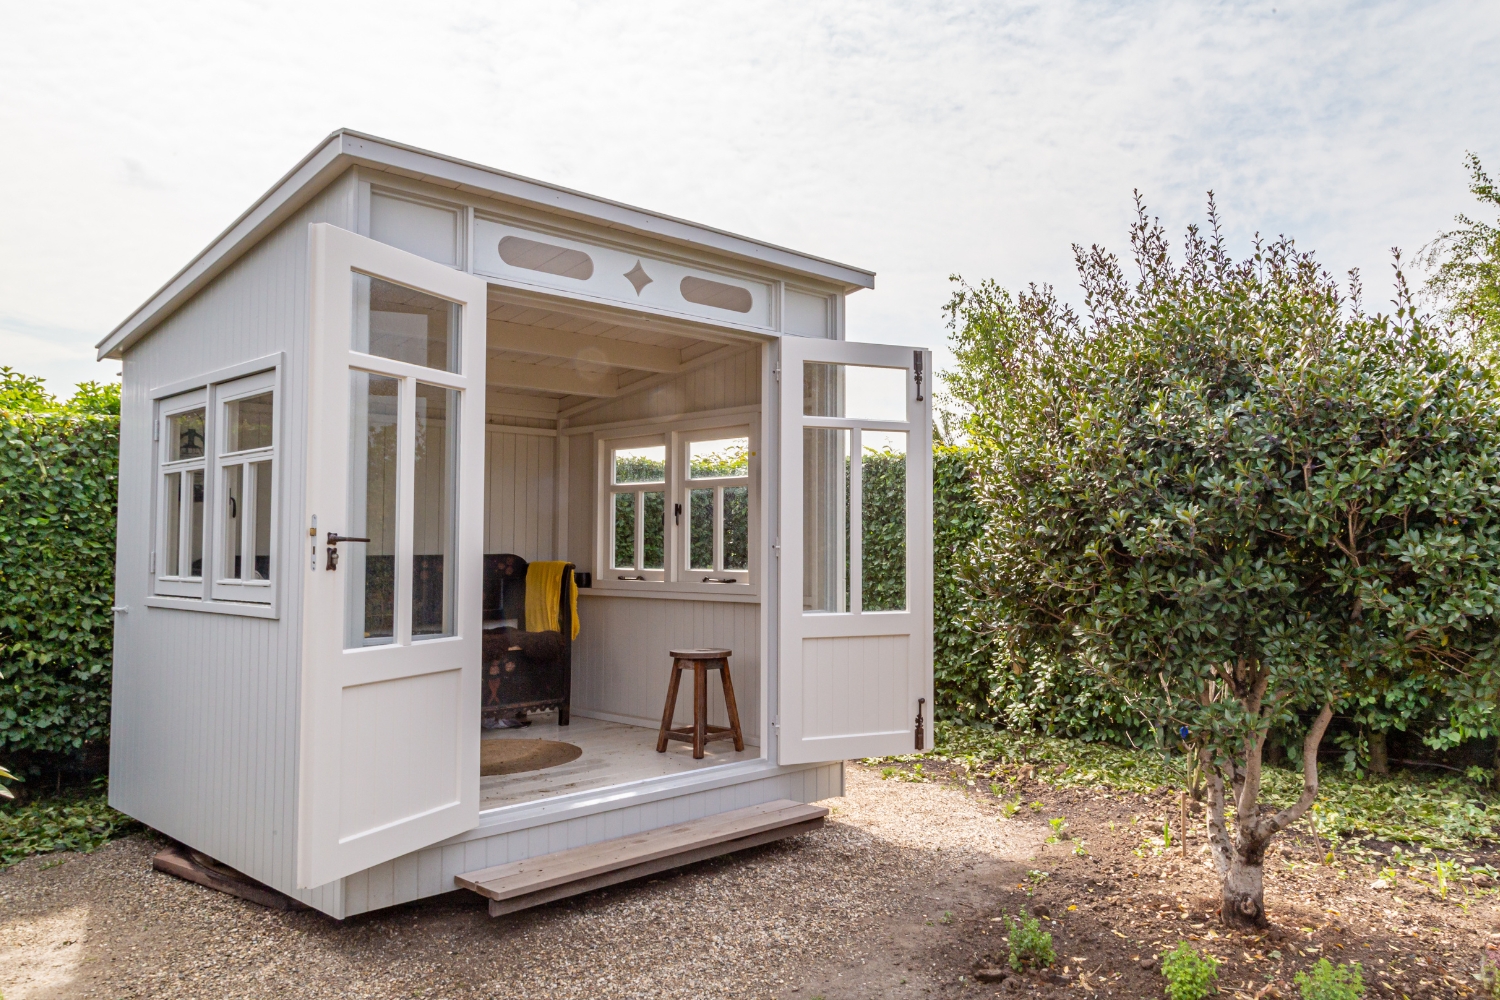
- The “Chill Out in Your Backyard Woods” Tiny House – Emphasis on cozy with a couch, a cot, a table, tv, basically a hangout space to sleep over the weekends within walking or short distance driving of your home.
14 Steps to Convert a Shed into a Tiny House
Step 1: Determine Your Vision and Budget for Your Tiny House
When building a tiny house, it is important to carefully consider every aspect of the project, regardless of how basic the house may be. Begin by envisioning your ideal tiny house and then assessing whether your budget matches your dream design.
Here are a few important factors to consider:
- Size – Determine how large or small you want your house to be. Keep in mind that 10×12 sheds are the largest size available without requiring a permit to build on your property, but they may be too small for your needs.
- Style – There are numerous shed styles available, but two popular options for tiny houses are the Tall Barn style with a loft or the Gable style.
- Electric or Solar Power – Decide whether you want to use traditional electricity or solar power to power your tiny house.
- Wood Stove – Determine whether you would prefer to heat your house with a wood stove. If you live in a colder state, a wood stove can save you a significant amount on your electricity bill and is a great option for off-grid houses.
- Plumbing – Decide whether you want to include a bathroom or fully functional kitchen in your tiny house.
- Interior Layout Design – Sketch out the layout of your tiny house and determine where you want the bed, bathroom, kitchen, living room, and other areas to be located. This will ensure that you have the appropriate amount of space and the right type of shed to transform into your dream house.
- Budget – Consider how much money you can afford to invest in your shed-to-tiny-house transformation. To be safe, expect at least a 20% increase in your budget if you plan on building a larger house. Make sure you can afford the project before proceeding too far.
Step 2: Choose An Already Owned Land or Buy Land
If you already have a piece of land where you plan to build your tiny house, it’s essential to evaluate the available space carefully to ensure that it’s the perfect location for your project.
If you don’t currently have any land, the process of finding a suitable plot can be an exciting adventure. Fortunately, since you’re building a tiny house, you won’t need to purchase vast acres of land. This is a significant advantage for you!
Step 3: Prepare a Strong Foundation for Your Tiny House
Ensuring a solid foundation for your shed is a crucial step that should not be overlooked. If your goal is to convert your shed into a functional and comfortable living space, a properly laid foundation is essential for long-term security and durability.
🚫 These foundation methods should be avoided:
- Setting the shed directly on the ground with no foundation
- Using just crushed gravel as a base (not a true gravel foundation)
💰 If you’re on a tight budget, the following method is not highly recommended, but can work sufficiently:
- Creating a crushed rock bed with cinder block piers on top
- Using a real crushed gravel foundation
✅ For livable tiny houses, these foundation methods are highly recommended:
- A real Pier and Beam foundation
- A Concrete foundation
- A Gravel shed foundation with piers
In summary, investing in a proper foundation will pay off significantly in the long run by ensuring that your shed is durable, long-lasting, and minimizes rot.
Step 4: Check Your Local Zoning Codes and Obtain Necessary Permits
It’s important to ensure that your tiny house is legally permitted. Whether you’re buying or building a shed, it’s essential to confirm that your future tiny house is approved by your local township.
This is particularly crucial if your shed exceeds 120 (or 100 in some states) square feet.
Although it may seem frustrating to obtain a permit initially, ensuring that your shed to tiny house transformation is done correctly from the start can help the entire process go more smoothly.
The real annoyance is having to halt your shed transformation process due to local government intervention.
In other words, it’s recommended to check with your local township and obtain a permit if necessary. 😊
Step 5: Purchase a Shed or Build One Yourself
You have two options for getting to your tiny house shed:
- Build it yourself or buy it from a local shed company – Some companies sell tiny house sheds that appear to be tiny houses from the outside. All you have to do is remodel the inside and you’ve got yourself a tiny house!
- If you have the necessary tools, skills and time, building your own shed is the way to go!
If not, finding a reputable and local shed builder provides you with a quick and quality way to secure your shed.
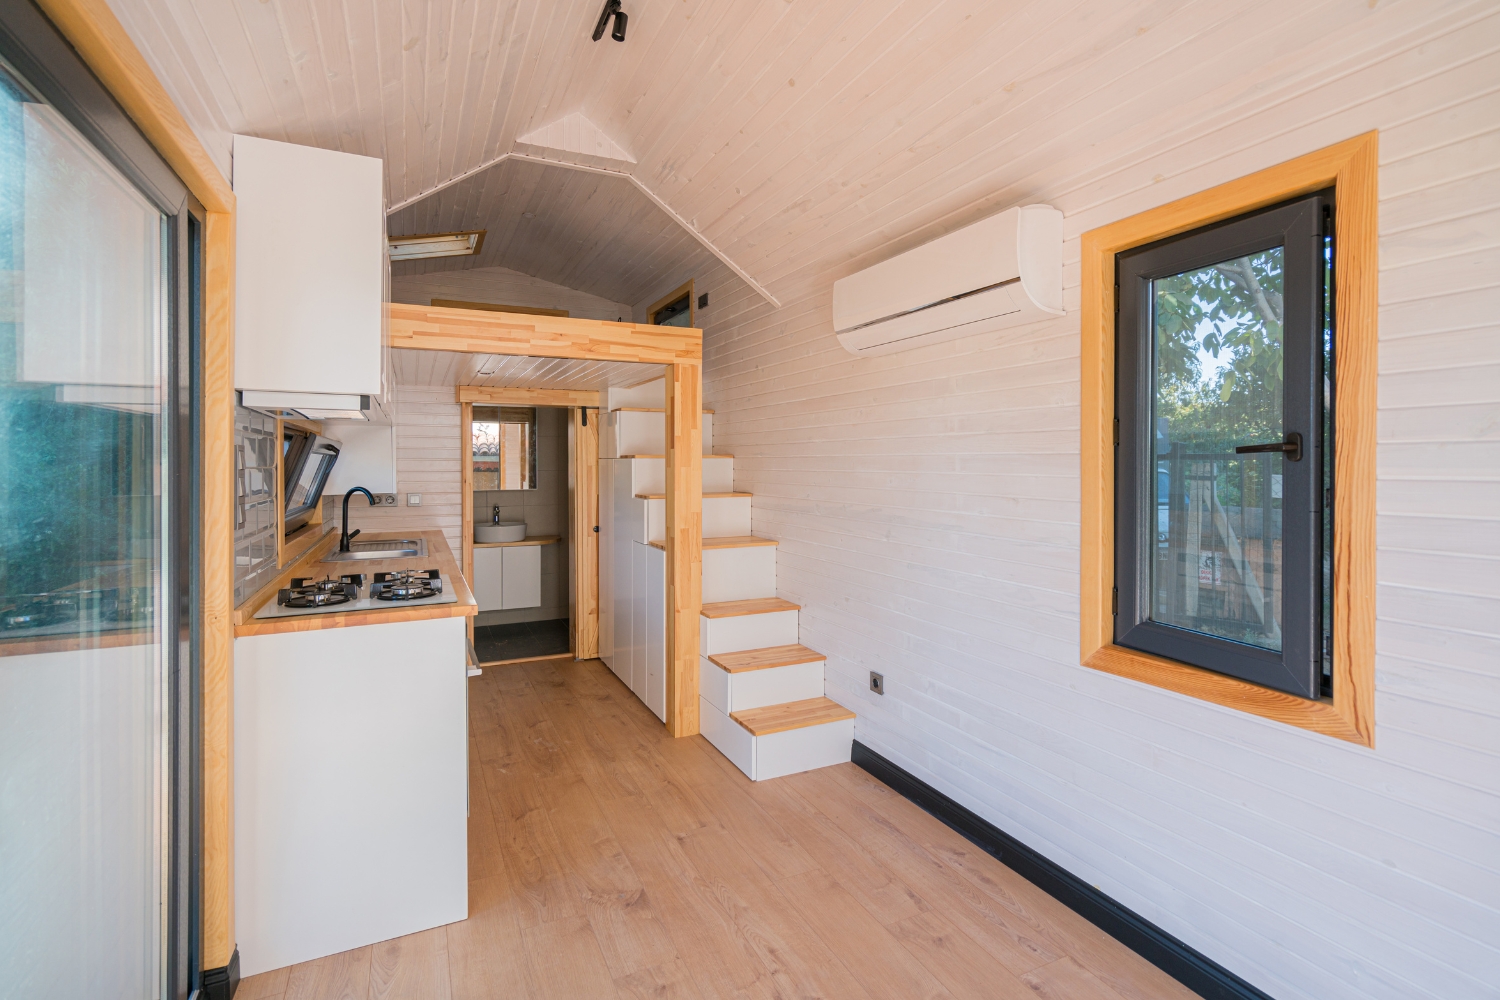
Step 6: Create Separate Rooms or a Bathroom
Depending on the size of your tiny house, you may have enough room to build separate bedrooms in the loft or even on the ground floor. Even if your tiny house is small, you should be able to fit in a separate bathroom space.
Step 7: Add Deadwood or Blocking to Strengthen the Structure
If you have opted for a larger lofted Barn-style shed, deadwood could be a useful addition. By nailing the deadwood into the corners or where the walls meet the ceiling, you can create a surface for attaching shiplap or drywall.
Moreover, deadwood can help you achieve a “vaulted” ceiling look with exposed beams inside your shed. Essentially, deadwood involves nailing 2x4s into all the corners or trusses where there is no available space to attach the ceiling material.
Although it takes time and does not strengthen the structure, adding deadwood is worth the effort in the long run. It makes the job easier and ensures that the job is done right.
Step 8: Decide on Your Electrical System and Install It
You have two options for powering your tiny house:
- Traditional electricity
- Eco-friendly solar power
After choosing which option you prefer, it’s important to carefully plan how to install your power source.
Keep in mind that if you’re building a larger tiny house and don’t have experience with electrical work, it’s recommended to hire a professional contractor for the rough electric. However, if your tiny house is small and simple, adding the rough electric and electrical connection yourself may be more feasible.
Step 9: Install Plumbing
It is strongly advised that you hire a professional contractor for the rough plumbing work inside your tiny house.
Consider your plumbing requirements carefully. Do you need plumbing for a bathroom, kitchen sink, dishwasher, and water heater?
You can explore do-it-yourself (DIY) plumbing options by watching videos like this one on tiny house plumbing. Alternatively, you may prefer to keep it simple or opt for no plumbing at all.
Step 10: Consider Methods for Controlling Moisture
Preventing mold is crucial for any homeowner. To achieve this, it is necessary to invest in moisture control methods that can prevent it. These methods include installing bathroom vents, a vent hood in the kitchen area, and using dehumidifiers. This is particularly important if you live in a very humid area or desire a fully functional tiny house.
You can learn more about preventing humidity and ensuring proper ventilation in your tiny house by checking out 18 helpful tips on the subject.
Step 11: Add Insulation for Comfort and Energy Efficiency
Insulating your tiny house is a necessity for two reasons:
- It regulates the temperature in both winter and summer.
- It reduces heating and cooling costs.
It’s important to insulate the walls, ceiling, and floor.
Common insulation options include:
- Loose Fill
- Foam Board
- Spray Foam
While all insulation options work, spray foam insulation is the best choice for your tiny house.
Here are some reasons why:
- It helps with moisture control because it seals tightly, eliminating the need for vents in the ceiling.
- Spray foam fills all the extra cracks that come with converting a shed into a tiny house. If your budget allows, you will have no regrets choosing spray foam for your walls and ceiling.
- Spray foam is solid, keeping small animals like mice from nesting inside your shed walls.
- You can more easily DIY adding insulation. However, to ensure the job is done correctly, it’s best to hire a contractor.
Ultimately, the decision is yours based on your budget.
Check out this helpful DIY video on adding spray foam insulation.
Step 12: Cover the Walls with Interior Siding
Congratulations! You are now approaching the final stages of transforming your shed into a charming tiny house. Well done! It’s time to cover those freshly insulated walls with something visually appealing. Here are some popular options for interior siding and ceiling coverings:
- Shiplap: charming and rustic
- Pine Tongue and Groove: delightfully woodsy and fragrant
- Metal Sheets: adds a rugged dimension
- Drywall: modern and classic (if you choose this option, painting will be necessary before proceeding to step 13)
Choosing one or a combination of these options will undoubtedly give your tiny house an inviting and irresistible house feel. Take a look at how Jack of All Master of None added ceiling drywall insulation and knotty pine shiplap to his off-grid tiny house.
Step 13: Install Flooring
Let’s revise the content:
It’s time for the final step in converting your shed into a tiny house – the flooring!
Here are some popular flooring options to choose from:
- Water-resistant Vinyl Plank flooring – This option is highly recommended.
- Engineered hardwood
- Tile
- Laminate – Although the cheapest option, it’s not moisture-friendly.
Step 14: Personalize Your Tiny House with Desired Amenities and Decorations
Congratulations, you have made it to the final step of transforming your shed into a tiny house! From here on, it’s a smooth sail. You have successfully converted your shed into a cozy tiny house!
Now, all you need to do is add your desired house amenities and decorations to complete the look and feel of your tiny house. Consider the following final touches:
Installing a bed(s) – Retractable beds are a great option if you’re tight on space. Furniture Refrigerator Table – A retractable table is a space-saving option to consider. Stove Heater and air conditioner Rocking chair house décor
You’ve got this! For more space-saving tips and inspiration for small house living, check out “It’s Small But BRILLIANT – A Tiny House Like No Other” You could also turn your tiny house into a work shed and enjoy the freedom of working from your own tiny house shed.
Although building a tiny house may seem challenging, just remember to take it one step at a time and watch your dream become a reality!
If you need a shed to get started, get a free quote and for pricing!

Read Other Posts...
How to Turn a Shed into a Potting Shed
Converting a shed into a potting shed not only allows you to organize your gardening tools but also provides a serene space to nurture your plants. In this guide, we'll walk you through the process of turning your shed into a potting shed, from planning and designing to setting up the perfect gardening environment. So, roll up your sleeves and let's get started on this exciting gardening project!
How to Convert a Shed into a Gym
We'll guide you through the seamless process of converting your shed into a fantastic gym in this blog post! Discover 10 simple steps that you can easily undertake on your own. By converting your shed into a gym, you'll make a valuable investment, saving both time and money that would otherwise be spent on gym memberships. If you're eager to achieve your fitness goals while being efficient with your resources, this blog is tailored just for you. Let's get started on this exciting journey!
How To Convert a Shed into an Office
This blog outlines 10 simple steps to convert your shed into an office space. With easy-to-follow instructions, this shed-to-office conversion can be accomplished as a DIY project. Creating a unique and functional office space from a shed doesn't demand much heavy lifting. If you're interested in transforming your shed into an office, this blog is tailor-made for you, providing a summarized guide in 10 straightforward steps.
Shed Permits in Louisiana: A Complete Guide
Shed Permits in Louisiana: A Complete Guide
How to Convert a Shed Into Tiny House
14 simple steps to convert your shed into a tiny house.
Man Cave Sheds – All You Need To Know
All you need to know about man cave sheds!
Porch vs. Patio: Which Outdoor Space is Right for You?
What Is a Porch? What Is a Patio? Differences Between the Spaces. Factors to Consider When Choosing Between Porch vs. Patio.
Loafing Shed: Solution to Sheltering Your Livestock
Whether you’re a seasoned farmer looking to improve your livestock or a beginner embarking on a small farm for a better livelihood, this comprehensive blog post provides all the necessary information about loafing sheds.
How Much Weight Can a Wooden Deck Hold
find answers to your "How much weight can a wooden deck hold?" questions and more.
10×20 Portable Garages for Sale in Louisiana
If you ask yourself questions like "Is a 10x20 portable garage the right investment for me? Or "Can I afford a 10x20 portable garage", this blog post is for you!
Gaming Sheds – All You Need To Know
All the answers to your gaming shed questions.
3 Types of Tractor Sheds for Sale in Louisiana
If you're in the market for an affordable, durable, and reliable tractor shed, you've come to the right place!
Best Shed Builder in Shreveport LA
At Gemco Building Systems, we specialize in providing our customers with high-quality storage solutions. Look no further than your local shed builder in Shreveport, LA. GEMCO Building Systems has been named to the INC. 5000 List of Fastest-Growing Privately Held US Companies.
Metal Utility Building | Uses and Sizes in 2022
Are you ready to purchase a 16x24 shed? Can you rent to own a 16x24 shed? 16x24 Sheds for Sale in Louisiana! Delivery and warranty available!
Portable Garage Sheds | The Benefits of Steel Garages
Are you ready to purchase a 16x24 shed? Can you rent to own a 16x24 shed? 16x24 Sheds for Sale in Louisiana! Delivery and warranty available!
Marvelous 16×24 Sheds for Sale in Louisiana – Buying Guide
Are you ready to purchase a 16x24 shed? Can you rent to own a 16x24 shed? 16x24 Sheds for Sale in Louisiana! Delivery and warranty available!
How to Park Two Cars in A Small Garage With Ease
Just because you have two cars doesn't mean you need the most oversized garage, and you can't use a small garage to fit two cars in it. 🙄 Are you getting an addition to your vehicles and have already started seeking parking solutions?
How Much Do Prefab Metal Buildings Cost? – 2022
How much do prefab metal buildings cost? If you're ready to purchase a prefab metal building in Louisiana, this guide is for you! 2022 Guide!
12×24 Portable Buildings for Sale in Louisiana
Are you ready to purchase a 12x24 portable building? How much room do you get in a 12x24 portable building? We offer financing and free delivery options!
10×20 Sheds for Sale in Louisiana
Are you ready to invest in a 10x20 shed? How Much Space Do You Get Inside a 10x20 Shed? Make Sure It is a Perfect Match!
Pole Barn Garage vs Portable Steel Garage
What Is a Pole Barn Garage? What Is a Portable Steel Garage? Pros & Cons of both types of buildings!
12×12 Sheds – DIY, Kit, or Prebuilt?
For you to make the best decision, let’s compare the 3 routes to your 12×12 shed, the pros and cons of each, the prices, and more!
What to Plant in a Greenhouse in Louisiana
let’s go over hat is a greenhouse, the benefits of a greenhouse, and then what to plant in a greenhouse in Louisiana!
Advantages of A Detached Garage
How much does it cost to build a detached garage. Cost of a prebuilt detached garage versus DIY.
Wood Vs. Metal Framing
Metal sounds durable and wood sounds cheaper, but really…Which is the best choice for you?
What Is a Prefab Cabin?
Since the dawn of time, men have been carving out little living spaces all over the world—for pleasure, protection, and privacy. Where's the latest innovation for lodging for the modern man? Discover the secrets in this post!